

How To Start A New Animation In Flash
Flash Animation
Animative in Flash requires certain understanding of motion and a lot of patience. Figuring out how the animation will work is not so difficult, but achieving the desirable upshot is usually painstaking. In the tutorial, nosotros'll explicate the timeline and frames, tweens, and other basic techniques needed to make animations happen. You'll be animative things before you know it.
Pose-to-pose blitheness in Flash is created by defining deportment in-between two points on the timeline, hence the term 'Tween'. In that location are two types of Tweens in Flash, Shape Tweens, which can only operate on drawing objects, and Motion Tweens, which tin merely operate on Symbols. Shape tweens let you to mutate from ane drawing object to another cartoon object with different properties or at a different location on the stage. Movement Tweens allow you to move an object along a path, resize or modify some basic properties of a symbol.
Shape Tweening
The bones idea is that at point A in time you have ane object, and at a later point B y'all take another object. Between the two points, you accept a gradual shapeshifting transformation from object A to object B. In order to Shape Tween, yous need two keyframes to mutate between. Like this, for example:

(Notation that to tween text in Flash requires breaking apart the letter of the alphabet symbol)
Lets get started on our first tutorial.
Pink Circle to Bluish Foursquare
1. Create a new Flash document, and draw a pink circle on the left side of frame i.
2. Click frame fifteen, and right click to insert a bare keyframe. Y'all now accept fifteen frames total of naught but a circle.
![]()
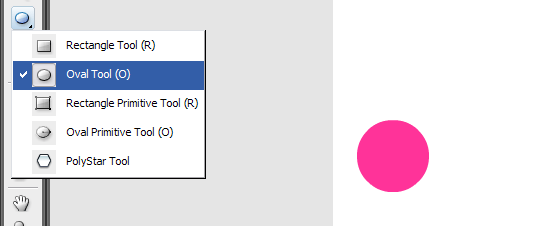
3. Select the keyframe at frame 15, cull the rectangle tool (non the rectangle archaic tool), and draw a big, blue foursquare on the correct side of the work area.
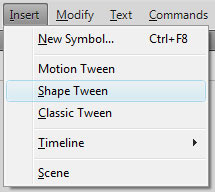
iv. Then select anywhere in the extended frame i, and Insert a Shape Tween from the bill of fare (or rt-click on the frame and select Shape Tween).
What we've but made is a shape tween. Between frames 1 to 15, a transformation occurs.
The most important matter to think when creating shape tweens is that unlike motion tweens, shape tweens must involve shapes or drawing objects and not groups or symbols. For a shape tween to work, the basic attributes "the stroke and fill" must exist able to alter so that it can morph the original shape into something else. The simplest way to ensure that all the elements you lot want to shape tween are "shape tweenable" is to select all the objects and use the Modify > Intermission Apart menu option to ensure they're broken down into their constituent elements.
To view what you lot've just made, CTRL- ENTER.
Motility Tween
Motion tweens tends to produce smaller file sizes, and they tend to exist easier to produce. If you have a choice between using either shape or movement tweens, it's generally better to go for motion tweens, and utilise shape tweens every bit sparingly as y'all tin can. Having said that, shape tweens give the experienced animator more control. Motion tweens let you to make the subtle blithe changes that add emotion and expression to characters, such as changes in facial expression during voice communication, or subtle body movements during walking.
Cartoon with Shape Tools
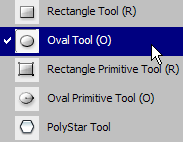
ane. Let us select the Oval Tool (O) from tool bar and drag-describe a circumvolve;
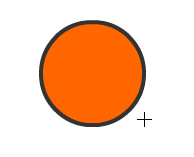
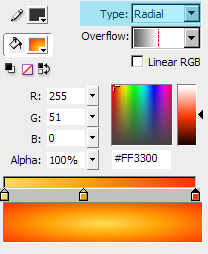
ii. Go to Fill Color and modify the color to vibrant orange; Also, go to property inspector and disable the stroke contour;
Applying Gradient
three. Go to the Color Panel, select Radial under the fill up type(highlighted), and add together an new slider in the gradient command so we tin can create a more than shine and naturally looking gradient.
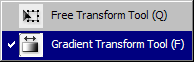
4. Go to Tool Bar and Select Slope Transform Tool;
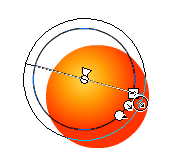
5. Click on the orange circle; at present yous can control the size, direction, and center indicate of the slope.
Converting to Symbols
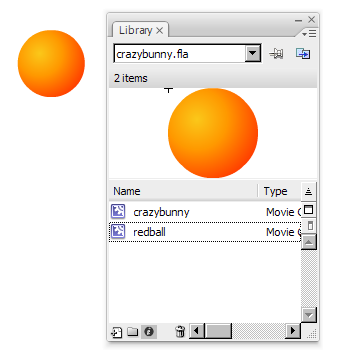
vi. After you are happy with what you got, click on the brawl and striking F8 or Correct-Click >>Convert to Symbol; set the symbol time to moving-picture show prune; note that the symbol you lot've just created is now in the library; and so delete everything in the stage and drag the movie clip: redball to the stage in frame 1.
Adding the Motion Tween
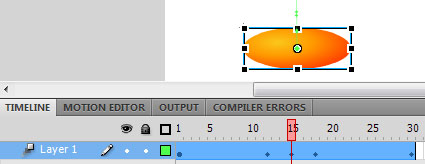
seven. At present we are going to breathing the ball and make information technology bounciness upward and downward. Click on frame 30, right-click and select 'Insert Frame' to extend the frame for 30 frames. Adjacent right-click anywhere in the long frame that was just created and select 'Create Move Tween'. Note that when nosotros create the motion tween the long frame turns blue and the rectangle at the cease disappears. The layer also now has a Tween icon next to its name.

viii. Now we need to add some movement to the tween by placing the ball at unlike places along the timeline. In a Movement Tween you move the small red rectangle at the top of the timeline, the shuttle, to the location where you want to modify tween backdrop. Let's move the shuttle to frame xv. Next hold down the Shift key and click and drag the brawl to the lesser of the visible phase (belongings the shift key ensures that we volition elevate the brawl in a directly line). Next move the shuttle to frame 30 and shift-drag the ball back to the top of the screen. Detect the green motion path created where the ball volition travel.
Run the animation by pressing CTRL-ENTER.
The animation works, yet, it lacks a realistic feeling since it moves up and downward constantly at the aforementioned speed; what we desire to exercise at present is to add some real-life ingredients; when a brawl hits the ground in real life, it volition squeeze and squash.
nine. Move the shuttle to frame 12, right-click the frame and select 'Insert Keyframe > Scale'

This adds a small black dot to the frame and saves the scale of the symbol at that frame. Practise the same affair for frame 18.
10. Finally, motility the shuttle to frame fifteen once more, select the Free Transform Tool from the toolbar and squeeze the ball a bit at the top and stretch the ball a bit at the sides.
Hit CTRL-Enter to run across the animation with the squash and stretch.
Easing In/out
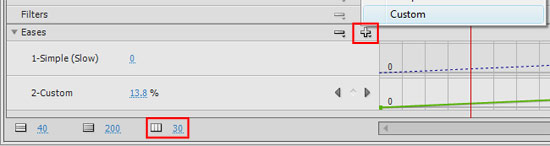
11. Gravity speeds things up when they are falling, if you demand more touches of existent-world physics, yous can employ Easing In/Out to brand your object move more naturally. Simple easing can be done by clicking on the tween and adjusting the Ease in the belongings tab. If we had seperated this into 2 tweens, we could have prepare one to ease in and one to ease out. All the same, we want i tween to both ease in and ease out. Custom easing in Flash CS4 is handled through the Motion Editor. Select the Motion Editor tab adjacent to the Timeline tab. Coil downward to the secion labeled 'Eases', click the + sign and select Custom (the cherry box in upper correct of the diagram below). Brand sure that the scale indicates 30 (the blood-red box in the lower left below).
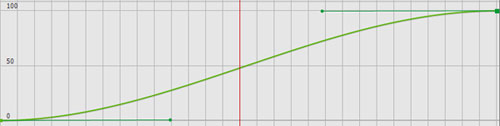
Click where is says 'two-Custom' to aggrandize the graph. Click the left control betoken, grab the handlebar and move it along the ten-axis. And then click the right command point, grab its handlebar and movement it so it is along the x-axis like below.
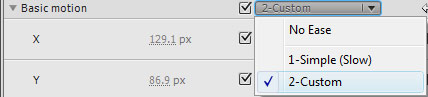
Finally, ringlet up in the Move Editor to where information technology says 'Basic Motion' and in the drib-down select '2-Custom' to bespeak that we want our custom ease applied to the motion.
Here is the final event of a simple billowy brawl animation.
Nesting Blitheness
Nesting means to place all the compositional element in 1 of your animation sequence into a unmarried symbol; Information technology is an incredibly powerful technique for animators.
With nesting, we can easily create blitheness similar this without using move path;
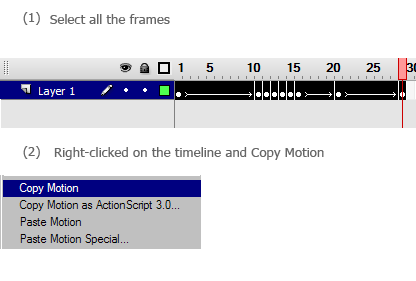
1. Let me show you lot how it works in this tutorial; first, allow us select all the frames on the timeline of your bouncing ball animation;

2. Right-click and select Copy Frames;

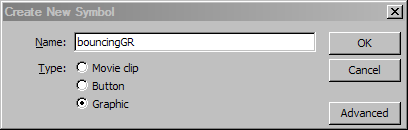
3. Create a new symbol named bouncingGR(y'all can employ anything you want), select Graphic as its type and click OK;
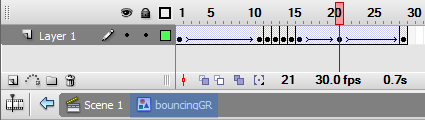
four. Double click on the new symbol in the Library, right-click on the timeline(if there is no frame on timeline, just press F6 to insert a frame) and select Paste Frames;
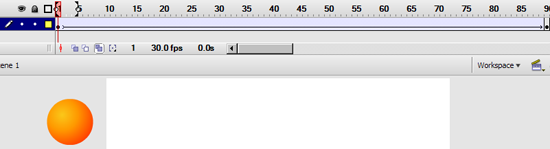
5. Now we can delete everything on the scene1's timeline since the animation has been pasted into a symbol; then permit us drag the symbol bouncingGR to the stage; On frame i, move the symbol all the mode to the left of the canvas; next, click on frame xc, press F6 then move the symbol all the manner from the left to the right of the stage; finally, let us create a movement tween betwixt this ii frames, then you will see the bouncing brawl is now bouncing across the screen.
Re-create Motion
In Wink CS3, not only that we tin copy frames, we can too copy motions. Copy motions allows you to apply the same motion to a complete different object.
3. Elevate the crazybunny graphic symbol to the stage(or if you take non imported it yet, simply import the crazybunny.swf file and convert to a symbol) ;
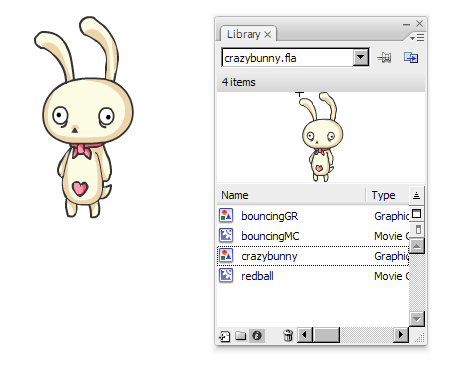
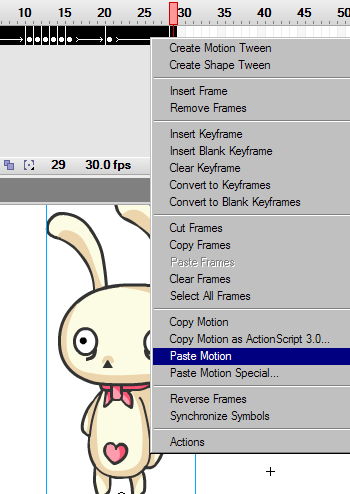
4. Select on the bunny, click on the timeline and correct-click>>Paste Motion;
6. Now this bunny is doing exactly the same thing every bit the bouncing brawl you simply blithe; Copy move is a very simple technique but information technology is a huge time saver.
Motion Path
Annotation that the green line which appeared when we first moved our symbol subsequently creating the motion tween is its move path. The move path is editable like whatsoever line. Click either end of the line to begin editing (both should be in the same place with our ball) and at present you can elevate the control points to brand the brawl motility anywhere on the screen.
Flash Masking
Hither nosotros are going to create a few animations using motion tweens in Wink. The finished file is in the source file masking.fla, only we will show you lot how to create this from scratch.
1. This is the animation we are going to exist making. Now lets brand it.
2. Before we create this animation, its good to know that usually you should be working in 30 Frames per Second or higher. Flash's default frame rate is 12, but you can gear up information technology past choosing the selection tool (five) and looking at the contextual tool bar at the lesser of the screen. For this animation nosotros will exist working at 12 FPS, but usually you will want to alter this, it will let you to make smoother and cleaner animations.

3. Next we are going to depict the first affair we want to animate, which is a box. Click on the Rectangle tool and draw a box on the phase.

4.Since we are going to animate 3 things we need to make iii layers. Y'all can create a new layer by clicking the Insert Layer button at the bottom left corner of the score.
5.At present we are going to plough the object that we created in Layer 1 into a Symbol and so we can animate information technology. You do this by selecting the shape and pressing F8 or by going to your menu and choosing Alter > Convert to Symbol. Once the box comes up with options in it, name your symbol and choose the beliefs: Graphic.

6.Y'all can now create the keyframes for your animation. The style this method of animation works (tweening) is by you creating keyframes (the frames with the little blackness dots on them) and on those frames setting the of import positions of your shape. Then when yous apply a motility tween, flash will fill up in the frames betwixt the keyframes for you. So the start keyframe, we have the box at the left side of the stage. To make a second keyframe at frame 20, click on the frame and press F6 to create a new keyframe. Then click on frame xl to create another keyframe. Since we want the box to go back and along nosotros are going to want the middle keyframe to have to box at the right side of the stage. And then click on the keyframe and motion the box to the right side of the screen. Now your 3 keyframes should have the box on the left, so on the correct, and the final one on the left over again.

7. At present nosotros want wink to make full in the frames between our keyframes and then that we become an animation. (1) Right click on each keyframe in the Blue Box layer and choose: Create Motion Tween. If you take washed everything right the frames should turn bluish with a little arrow (2).


8. If you drag through the score, or press Render, your blitheness should play through now. The box you created should be sliding back and along. To create a more polish and organic looking animation click on the keyframes that you lot accept applied a motion tween to, and in the contextual menu at the bottom of your screen put Easing to 100, or -100, play effectually with the effects of this.

nine.At present in the layer above your blue box layer, depict a circle. We are going to create a Shape Tween animation with this shape. You need to make ii more keyframes using F6 just similar you did for the Bluish Box animation, still, in the middle frame, delete the circumvolve and depict a different shape somewhere else on the stage. In this case I made a box. Now, instead of correct clicking on the keyframes and selecting motion tween, y'all demand to click on the keyframes and go down to your contextual toolbar where you can choose Motion from the Tween pull down carte du jour (i). If y'all did everything correct your shape tweened frames should be green with petty arrows in the frames, as y'all can encounter in effigy (2).

ten.And then at present we are going to make 3rd and concluding animation, and that will be animative a mask over some text. The get-go thing you desire to do is create your text using the text tool (t) in a new layer. Fill up in 40 frames with this text, so click on frame 40 and printing F5, this will create frames in the score. At present that you lot have your text, create a motion tween animation on a layer in a higher place it but like yous did for the bluish box. Make sure your animation is happening correct over the text. Now all you lot accept to practise to turn your animation into a mask is right click on the layer and choose: Mask.

11.To preview your animation in the finish just hitting Command-Enter or Command-Enter on a PC. And that's the finished animation. If yous have any questions or you are confused about something your mentors in class.
Masking Exercise
At present you know the simple mechanic of masking, Give this a try! (source files are in the Masking.fla library)
Dorsum to top
Source: https://www.sfu.ca/~tutor/techbytes/Flash/fl1.html
Posted by: korandooundes.blogspot.com
0 Response to "How To Start A New Animation In Flash"
Post a Comment